Wednesday, August 26, 2009

What I Love Wednesday - Going on a holiday!

That is right - the McCarthy family are packing our suitcases and going for a 5 day trip to Melbourne.

I'll be back on Tuesday next week - have a great weekend everyone!

Tuesday, August 25, 2009

Tuesday Etsy Picks (Favourite Sellers) - Ashley G and Drew

Ashley Goldberg has some amazing prints for sale on Etsy. I love, love, love all of her work - the colour schemes, the simple faces and the beards! She also has a lovely little blog at Kitty Genius - take a look if you have some time.


1. A Look Only You Would Understand (Orange) $20 2. Ashley G Postcard Set $15 3. Going Swimmingly $20 4. Miniature Raindrop (Orange pattern) $19.95 5. Merrily Merrily Home $52 6. I'm Right Behind You $20 7. Abstract 1 $20 8. Miniature Puppy $19.95 9. Trust Your Instincts $20

Giveaway Winners

Before I start, thank you everybody that entered my little giveaway - I always love receiving all of your comments.

Now, following in the tradition of my previous giveaway I decided that Zoe will draw the three winners of my cupcake prints, so I put each entrant's name in a bowl...


Zoe pulled out three pieces of paper (well she actually pulled out more than that, but I took the first three to be the winners)...


Then when I tried to snap a photo of the winners Zoe got kind of upset...


So fast forward ten minutes after a lot of rocking, patting and soothing words, and we have our winners...


Congratulations Chantel from Creative Hands, Becky from Strumpet's Crumpets and Jessy from Apparently Jessy. When you lovely ladies have a chance email your address to alicia.mccarthy at hotmail.com and I'll send out your prints.

Thanks for playing everyone!

Monday, August 24, 2009

Blog This - Challenge 13 - Gifts!

I recently discovered Blog This - a way to connect Australian bloggers together, but it also provides wonderful blogging ideas too. This weeks challenge is to think of five presents you would like for your next birthday, so without further ado I present my wish list...

First off, a good massage never goes astray.


I think everyone needs some cake on their birthday, this one looks pretty darn good.


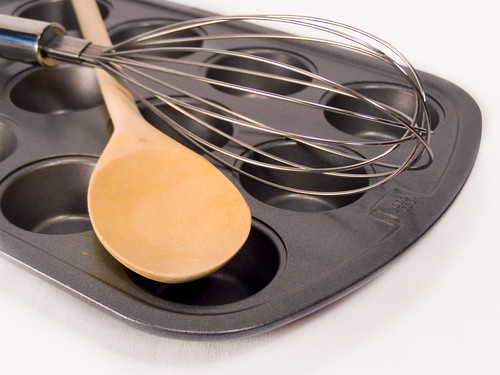
New baking supplies make my heart go pitter patter - you can never have enough!


A nice long sleep in, need I say more.


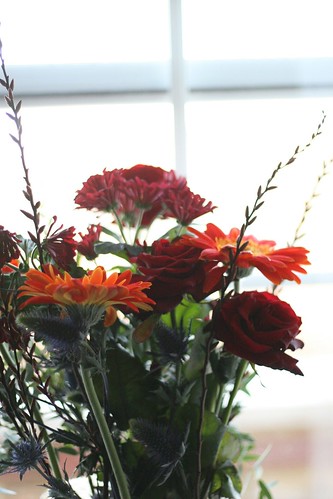
Finish it off with a nice bunch of flowers, I don't ask for much do I ;)

Baking Mondays - Q is for Anzac cupcakes with 'Q'uick oats


Anzac cake topped with vanilla swiss meringue buttercream and an Anzac biscuit.

I think that any Australian would straight away associate oats and baking with Anzac biscuits. For those of you that don't know Anzac biscuits are made from rolled oats, flour, coconut, sugar, butter, golden syrup and bicarbornate of soda. Sound good? Yeah I thought so. There is also a bit of background associated with these little beauties, since the ingredients do not easily spoil they were sent with the men in the Australian and New Zealand Army Corps (ANZAC) during World War I. So they hold a special meaning to us all in Australia and we like to consume them on mass on Anzac day (April 25th). So yeah, when oats won I knew straight away I was going to make some Anzac cupcakes and here is the recipe I used...

Anzac cupcakes (from Best Recipes)
Makes 16 cupcakes

125 g unsalted butter
250 g golden syrup
6 eggs
120 g self-raising flour, sifted
120 g rolled oats (I used quick oats)
150 g desiccated coconut
80 g icing sugar, sifted
  1. Preheat oven to 170°C; line 2 12-hole muffin tins with cupcake liners.
  2. Melt butter and golden syrup over low heat, set aside to cool slightly then beat in eggs.
  3. Combine flour, oats, icing sugar and coconut in a bowl, stir in butter mixture.
  4. Spoon into prepared muffin tins and bake for 20 minutes, test with cake skewer.

Vanilla Swiss Meringue Buttercream


Follow the directions for Almond Swiss Meringue Buttercream, but use 2 tablespoons of vanilla extract and omit the almond essence.

Assembling the cupcakes
  1. Once cupcakes have cooled pipe a swirl of SMBC.
  2. Top each cupcake with an Anzac biscuit (I bought mine - because I am lazy, but you could use this recipe from Best Recipes instead).

The ratings?

Me - 8/10, the cake really does taste like an Anzac biscuit (yum!), but it is a bit dense. I love the vanilla SMBC and Anzac combination, and can't complain with a biccy as well!
Mat - 9/10, just like an Anzac biscuit, only more cupcakey.

Also don't forget to enter my little giveaway - you have until tomorrow :)

And with that I am off - there is a crazy storm here at the moment and the lights keep flickering - scary!!

Thursday, August 20, 2009

And the winner is...

Quick Oats

Tune in on Monday to see the oaty cupcake creation!

Creative Thursday and a Giveaway


Some time ago I carved some lino, months later I finally got around to doing some printing. I have to say that there is something truly relaxing and wonderful about hand pressing your own lino prints. I think this is one form of art/craft that I could really get into it. Lino printing is fun, inexpensive and you can get some wonderful looking products at the end of it. I printed lots of my little cupcakes in strong black ink, check it out...


And that brings me to the second part of this post - the giveaway! To celebrate The Red Deer receiving more than 1,000 comments I would love to send some cupcake prints to 3 of my fantastic readers. If you would like a chance to win all you have to do is leave a comment telling me what you like best about The Red Deer blog and what your favourite colour is. That is it! The giveaway will end next Tuesday the 25th of August at 12:00 pm. So get commenting :D

Wednesday, August 19, 2009

What I love Wednesdays - Getting to 1,000 Comments!

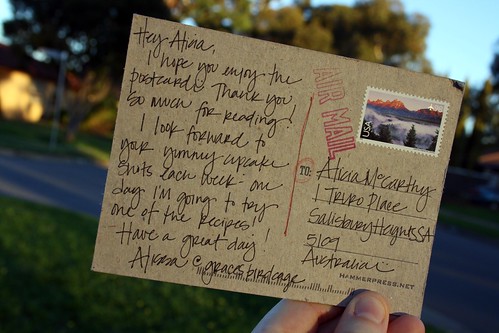
That is right - Alissa from Grace's Birdcage gave The Red Deer its 1,000th comment today. To celebrate I might just hold another giveaway, I'll let you know all about it tomorrow.

In the mean time thanks everyone for tuning in and reading my blog, and for leaving all of your lovely comments.

Tuesday, August 18, 2009

Tuesday Etsy Picks (Favourite Sellers) - The Black Apple

Anyone that knows Etsy knows about The Black Apple - wonderful paintings, prints, softies and other bits and pieces. Here a just a few of the wonderful items that are available for purchase...


1. Swan Girl Bookplates $12 2. Circle Time Print $16 3. Pocket Notebook 3 Pack $10 4. She Moves Among the Sparrows Print $13 5. To and From Labels with Bunny Rider $12 6. Cold Toes Warm Heart Print $18 7. Laundry Day Print $18 8. Caty Creepeth Print $18 9. Little Bear Print $18

Monday, August 17, 2009

Happy 10 Months Zoe!


Happy 10 months baby girl!

This past month you have mastered crawling and have decided that you now want to stand up as much as possible, it won't be long now until you take your first steps. You have also begun to get quite talkative with lots of dadas, ya yas, ehs, ahs, gahs, rahs - but still no mum! You have also had your first bad cold, which has resulted in lots of hugs and cuddles from mum and dad, lots of nose wipes and a trip to the doctor tomorrow.

I'm looking foward to seeing what this next month has in store for us - only 2 more months until your first birthday!

Baking Mondays - P is for Peanut Butter Cup Cupcakes


Chocolate cake with half a homemade peanut butter cup inside, topped with peanut butter swiss meringue buttercream and half a homemade peanut butter cup.

Who here loves peanut butter cups? I happen to love them - chocolate + peanut butter + sugar, how can you complain? So when peanut butter won the poll last week I knew what had to be done, it was time to make my own peanut butter cups. I used a recipe from The Hungry Mouse, it was super easy and the end result is delicious!

Homemade Peanut Butter Cups adapted from The Hungry Mouse
Makes 40 mini cups

2 x 395g milk chocolate
375g smooth peanut butter
3/4 cup icing sugar, sifted
1 tbsp vanilla extract
  1. Melt the first packet of milk chocolate (either in the microwave in 40 second intervals or using a double boiler).
  2. Coat 40 mini muffin liners in the chocolate, then place in the fridge to set.
  3. Meanwhile, combine the peanut butter, icing sugar and vanilla extract in a bowl and stir.
  4. Spoon the peanut butter mixture into each cup and flatten with your finger.
  5. Melt the second packet of chocolate.
  6. Pour chocolate over each cup to enclose the peanut butter mixture, then place in the fridge to set.
So now armed with your homemade peanut butter cups it is time to incorporate them into your chocolate peanut butter cupcakes...

Peanut Butter Cup Chocolate Cupcakes (adapted from AllRecipes.com)
Makes 22

220g plain flour
45g cocoa powder
7g bi-carb soda
6g salt
300g caster sugar
115g unsalted butter, softened
2 eggs
8 ml vanilla extract
355 ml milk
22 homemade peanut butter cups, cut in half (reserve half for decoration)
  1. Preheat oven to 175 degrees celsius. Line 2 12-hole muffin trays with cupcake liners.
  2. Sift together the flour, cocoa, baking soda and salt, set aside.
  3. In a medium bowl, cream together the sugar and butter until smooth. Stir in the eggs and vanilla.
  4. Gradually mix in the dry ingredients, alternately with the milk. Once all of the ingredients have been incorporated, mix on high speed of an electric mixer for 2 to 3 minutes.
  5. Spoon some of the batter into each cupcake liner, then place half a peanut butter cup, and then cover cup with more batter.
  6. Bake for 15 minutes in the preheated oven or until a toothpick inserted comes out clean.

Putting it all together
  1. Make a batch of peanut butter swiss meringue buttercream.
  2. Once the cupcakes have cooled pipe a swirl of the SMBC onto each cupcake.
  3. Top each cupcake with half a homemade peanut butter cup.

The only problem I came across after making these was this...


All of the peanut butter cups sank to the bottom of the cupcakes - oh well. Still tastes good!

The ratings?

Me - 9/10, cake is beautiful, moist and chocolatey, SMBC is wonderful as always, peanut butter cups rock - the only issue was the sinking peanut butter cups.
Mat - 10/10, absolutely awesome!

Thursday, August 13, 2009

And the winner is...

Peanut Butter

Tune in on Monday to see what peanutty, buttery cupcakes that I create.

Hmmm the Letter Q...

I need help people - what are some flavour ideas for the letter Q? I have been racking my brain and I can't think of anything!

Leave me a comment if you have an idea.

Thanks!

Wednesday, August 12, 2009

What I love Wednesdays - Sleeping

It is funny how much I under appreciated sleep before Zoe - now after a hellish night I would give anything for a full night sleep again.

Tuesday, August 11, 2009

Tuesday Etsy Picks (Favourite Sellers) - The Small Object

Do you love rubber stamps, stationery and cuteness in general?

Of course you do, and that means you will love The Small Object! This seller makes the cutest little rubber stamps - I want, I want! It actually makes me want to start carving some rubber stamps myself, they would make great little presents.

I also love the wedding toppers, which can be customised to match the husband and wife - what a great idea. In fact I love all of the wooden goods in this shop, they are just too cute. Who am I kidding I love everything in this shop!! Go take a look, you know you want to.


1. Saw See Sew Wooden Needle Case Holder $6 2. My Little Sweeties Rubber Stamp Set $24 3. A is for Artistamps $18 4. The String Keeper Cans $16 5. Happy Helper Wine Bottle Stopper $15 6. The Peter Skittles Bowling Pin $12 7. The Doodle Dozen Button or Pin Set $32 8. The Miniature Tiny Mustache Stick $6 9. Wedding Topper - Lucky Be Loved $155

Monday, August 10, 2009

Baking Mondays - O is for Oreo Cupcakes


Chocolate Oreo cupcake topped with Oreo cream cheese frosting and an Oreo.

Can I just say yum! These cupcakes are really, really good - I could eat a lot of them, although I am refraining myself from doing so. Even Mat said it was one of the best cupcakes I have made so far, so that must be saying something. So if you like Oreos and chocolate (and who doesn't) then you must make these cupcakes - trust me you will love them.

Oreo Cupcakes from the Cupcake Project
Makes 18 cupcakes (I got 29 out of it - my cupcake trays are small)

3/4 cup unsalted butter, softened
2 1/4 cups brown sugar (I only used 3/4 cup)
8 oz dark chocolate, melted
3 large eggs, separated
2 tsp vanilla extract
2 cups plain flour
1 tsp baking powder
1 tsp baking soda
1 3/4 cups milk
8 Oreo cookies, smashed to bits (place the cookies in a plastic bag and smash with a rolling pin)
29 Oreos halved
29 Oreos to decorate cupcakes with
  1. Preheat oven to 180 degrees celsius and line 3 12-hole muffin trays with cupcake liners.
  2. In each cupcake liner place half an Oreo (the half with the cream filling still on it). Reserve the other half for the frosting.
  3. Beat butter and sugar until light and fluffy.
  4. Mix in egg yolks.
  5. Mix in vanilla and chocolate.
  6. In a separate bowl, mix the flour, baking soda, and baking powder.
  7. Alternate adding the flour mixture and milk to the butter/sugar mixture.
  8. Stir in Oreos.
  9. In a separate bowl, whip egg whites until peaks form.
  10. Fold the batter into the egg whites.
  11. Fill cupcake liners almost to the top.
  12. Bake for 20-25 minutes or until a toothpick comes out clean.
  13. Once cupcakes have cooled top with Oreo cream cheese frosting and an Oreo.
Cream Cheese Oreo Frosting by Cupcake Project

8 oz package of cream cheese, softened
1/4 cup unsalted butter, softened (I used 3/4 cup)
3-4 cups icing sugar (I used 4 cups)
1/2 t vanilla extract (I omitted this)
3/4 C crushed Oreos (I used the 29 half pieces of Oreo cookies from the cupcakes, crushed very finely in a food processor)
  1. Whip cream cheese and butter until light and fluffy.
  2. Mix in powdered sugar one cup at a time.
  3. Add vanilla extract. (I didn't do this)
  4. Gently stir in crushed Oreos.

The Ratings?

Me - 9/10 - almost perfect! The cake is light and spongy with a great flavour, not too rich and not too sweet. The frosting is yummo and having the secret Oreo on the bottom of the cupcake is great.
Mat - 10/10 - sensational!

Wednesday, August 5, 2009

What I love Wednesdays - Putting my feet up

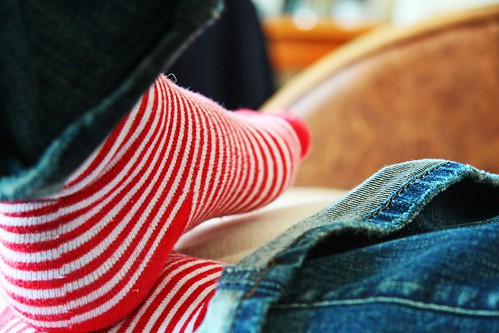
After a long and tiring day there is nothing I love more than to put my feet up and relax in the lounge room while watching some favourite shows and browsing the Internet on my laptop.

What do you like to do to wind down?

Tuesday, August 4, 2009

Happy 27th Birthday to Me!


It was my birthday on the weekend and I got spoilt as per usual. The day started off at 5:30am when Mat brought Zoe in to bed for her morning breastfeed - then he took her into the lounge room so that I could have a lovely little sleep in.

After getting the grocery shopping done my mum, Mat, Zoe and I packed up and headed to Hahndorf (a little place in the Adelaide hills) to have lunch, buy some bum burners (very hot sausages) and wander through the lolly shops.

We finished up the day relaxing on the couch, eating lollies for dinner, crying through Marley and Me and drinking caffiene free Diet Coke. Very healthy!

I was lucky to get some lovely gifts - my new digital camera (which Mat gave me a month early), some books to help me figure out said camera, new perfume, pretty underwear, a few singlets, a beautiful pink felted scarf, $28 worth of lollies and some spending money. Thanks everyone!

My win :D

I received this wonderful postcard from Alissa over at Grace's Birdcage a while ago (I would of posted it earlier but my Internet connection has been really slow lately).


Thanks Alissa!

Tuesday Etsy Picks (Favourite Sellers) - SpiceRak Designs

I have long wanted to get myself a gorgeous apron to do my baking and hosting in - but I still haven't gotten around to buying or making one. So I thought it was fitting to feature an Etsy seller that has some beautiful retro aprons, without further ado...


1. Vintage Style Double Perfect Circle Full Apron $43 USD 2. Vintage Style Cotton Luncheon Napkins $16 USD 3. Vintage Style Sunday Brunch Full Apron $33 USD 4. Retro Cotton Luncheon Napkins - Set of Four $16 USD 5. Vintage Style Double Perfect Circle Hostess Apron $35 USD 6. Retro Set of Trivets/Hotpads $14 USD 7. Vintage Style Perfect Circle Hostess Apron $27 USD 8. Vintage Style Set of Four Large Placemats $30 USD 9. Vintage Style Icecream Social Hostess Apron $26 USD

Sunday, August 2, 2009

Baking Mondays - N is for Nougat Cupcakes


Honey, orange and almond syrup cake topped with nougat cream and chunks of almond nougat.

We had a very clear winner this week, nougat absolutely smashed the nuts (no pun intended) and the neapolitan in the polls, and why wouldn't it? Nougat is delicious - sometimes chewy, sometimes crunchy, full of nuts and always good. But how do you incorporate nougat into a cupcake? Well first of all I thought of the nougat flavours that I particularly like - and I came up with almonds and honey. So of course it was only natural to make a lovely almond and honey syrup cake. Then what do you top said syrup cake with? I decided not to go down the SMBC (swiss meringue buttercream) route this week and instead went for a whipped cream topping instead, with just a taste of almond, orange and honey.

So shall we get started....

Honey and Orange Almond Cupcakes (taken from Chef 2 Chef, I halved the recipe)
Makes 12 cupcakes

1 cup sugar (I used caster sugar)
1 cup almond, ground (110g almond meal)
1 cup plain flour, sifted
3/4 tsp cinnamon
1/4 tsp ground all spice (I used mixed spice)
4 large eggs
1/4 cup butter, melted
2 tsp orange zest

1/3 cup orange juice
1/2 cup honey
1/6 cup icing sugar
1/8 cup water
  1. Preheat oven to 180 degrees celsius and line a 12-hole muffin tray with cupcake papers.
  2. Combine the almond meal, flour, cinnamon and mixed spice in a bowl.
  3. In a separate bowl mix eggs with sugar until very thick, approximately 10 minutes.
  4. Beat in the melted butter and orange zest and then fold in the almond mixture.
  5. Divide the batter among the cupcake papers and bake for approximately 20 minutes or until a toothpick comes out clean.
  6. To make the syrup combine the orange juice, icing sugar, honey and water in a saucepan and heat until sugar dissolves and the mixture is hot.
  7. Once cupcakes are baked spoon over the syrup.

Nougat Cream

300ml thickened cream
3 tbsp honey
1/4 tsp orange essence
1/4 tsp almond essence

Beat all ingredients until you reach a piping consistency - don't overbeat the cream!!

Assembling the cupcakes
  1. Pipe the nougat cream onto each cupcake.
  2. Top each cupcake with some almond nougat. Go crazy - you know you want to!

The ratings?

Me - 9/10, this is cake is lovely - nice and light and I love the spices in the mix - tasty stuff! The cream is good for something different, but I don't think I would use the almond essence again.
Mat - 8/10, cake was dense but still awesome!

And the winner is...

Nougat

Check in tomorrow to see the naughty nougat creations.